Today I will take you on a pictorial journey showing you the step by step process of making Italian Rainbow Cookies, a confection made with layers of brightly colored, almond-based sponge cake, apricot and/or raspberry jam, and a chocolate coating. This journey will not take long, but if you choose to actually venture to make these, set aside a good couple of hours and some patience. This was my first attempt and happily discovered these were not difficult to make, just very time consuming. The recipe source I used is from Bon Appetit, their printable recipe is here: http://www.bonappetit.com/recipes/2011/05/rainbow-cookies These cookies are also known as Italian Flag cookies because the colors resemble the Italian Flag.
**Special Equipment and ingredients: you will need 3 13 x 9 x 2" metal baking pans; almond paste - which is quite expensive, by me 1- 7oz tube was $6.99!
Ingredients:
4 sticks unsalted butter, cubed and at room temp
6 large eggs, whites and yolks separated
1 1/3 cups sugar divided
12 oz almond paste, broken up (a little less then 1 1/2 7 oz tubes)
2 3/4 cups plus 1 Tbsp all purpose flour
1/2 tsp kosher salt
1 tsp salt
1 tsp red food coloring
1 tsp green food coloring
3/4 cup raspberry jam (or apricot)
4 oz bittersweet chocolate, chopped and melted - wait to melt when your ready to finish off the cookies
Instructions:
Preheat oven to 350 degrees. Line your 3 pans with aluminum foil, leaving an overhang, spray pans generously with baking spray. Put egg whites in the bowl of a stand mixer fitted with a whisk and beat until soft peaks form. Slowly add 1/3 cup of the sugar, beating until stiff peaks form, like below. Transfer to a large bowl, cover and chill. Using the paddle attachment beat the almond paste and remaining sugar on med-low until incorporated, 4-5 mins. Increase speed to med-high, gradually add butter, beat until fluffy. Beat in yolks, then flour and salt. Fold in whites in 2 additions. The batter will be very thick.
Divide batter evenly among 3 bowls (as evenly as you can, I weighed mine to get them as close as possible). Mix red coloring into 1 bowl and green coloring into second bowl; leave third bowl plain. Spread 1 bowl of batter into each prepared pan, smoothing tops with an offset spatula. Bake, rotating pans halfway through, until just set 9-10 mins. Let cool in pans.
When completely cooled, start the layering: with a pastry brush spread half of the jam over the green cake - I used all raspberry on both layers - but you can use apricot or orange marmalade or a combination of these.
Now carefully, using the foil overhang, lift plain layer of pan and invert onto green layer, discard foil.
Yes, did it! Then brush remaining jam over plain layer.
Carefully, again, lift the red layer out of pan using the overhang and invert onto the plain layer
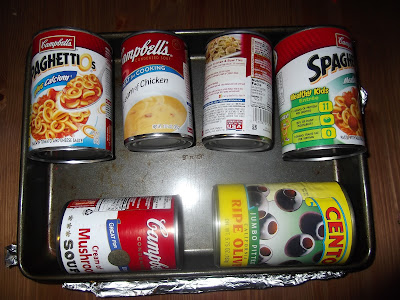
Cover cake with foil and top with a 13x9x2 pan. Weigh down pan with several heavy canned goods to compress the cake layers. Refrigerate at least 4 hours and up to 1 day.
Remove cans, top and foil. Transfer cake to a waxed paper lined baking sheet. Spread half of the melted chocolate over cake in a thin layer using an offset spatula. Then freeze for 10 mins. Cover with waxed paper, and invert the baking sheet on top and flip the cake. Uncover and glaze with remaining chocolate, then freeze an additional 10 mins.
It looks a little messy at this point (so does my kitchen - don't look, it's very busy this time of year!!), but don't fear, we are going to trim it next and make it look all neat :)
With a good serrated knife trim off edges to make the cake approx 12 x 8"
Don't throw those edges out, save them to eat!
Then cut into six 2" wide strips, look how neat they are looking, like real rainbow cookies!!
Then cut each strip crosswise into 96 1/2 " wide cookies (2" x 1/2" cookies). Store in an airtight container.
All my rainbow cookie lover friends and family loved these and were quite impressed!
Don't be intimated by the process it was fun and very worth it.
Enjoy!


I've always love rainbow cookies but had no idea how they were made. Great step by step!
ReplyDeleteThanks Anita!!
Delete